I found this nifty set of instructions on Wiki-How. Personally, we have a metal well pump sunk on our property and we’re virtually townies (darned city keeps moving closer!).
 Now we don’t use it day to day, but we have a brand-new pump head in a box from Sears all ready to go in case the old one is rusted up when we need it. We all know how to make it work, and we all know how to purify the water if the SHTF.
We’re lucky. Our soil is soft Virginia ground. If you live on rocky land, installing a pump might require more than the handheld auger used in the diagrams below. But I like the basic do-it-yourself approach to the pipe. While my pump is all metal and is tough, the water does taste a bit metallic. I would use this PVC approach if you need it as an emergency backup or for the bottom of the yard where it’s too far for a hose to reach.
Steps

-
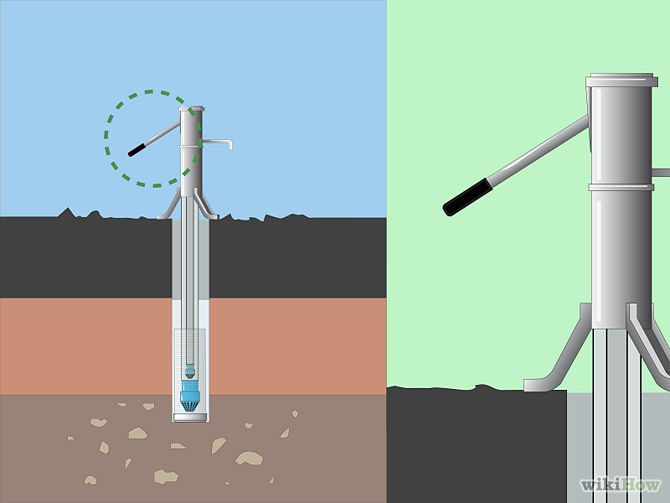
Prepare the Well Screen. The well screen is the main structural component of the well. This component is the widest pipe used in the construction of the well, and it is called a screen because it has a series of circumferential slits cut along the length of the pipe (resembling a screen). This screen allows water to enter the pipe (allowing the well screen to also act as a reservoir), while keeping out mud and other debris.
- Mark the well screen pattern. The well screen will start 4 inches (10.2 cm) from the bottom of the 8 inch (20.3 cm) PVC pipe.

- Using the permanent marker, mark three slits circumferentially around the 8 inch (20.3 cm) pipe. The slits should be approximately 7 inches (17.8 cm) long and should be equally spaced apart. The gap between each slit should be approximately 14 inches (10.2 cm).

- Repeat this step two inches above the first set of slits.

- Repeat until the well screen is at least 6 feet (1.8 m) in length.

- Use the hacksaw to cut the well screen.

- Cap the well screen

- Apply a coat of primer to the mating portion of the end cap.

- Apply a coat of primer to the mating portion of the well screen.

- Apply a coat of pipe glue to the primed locations.

- Install the end cap quickly and allow to dry (Installation will vary depending on end cap used).


- Mark the well screen pattern. The well screen will start 4 inches (10.2 cm) from the bottom of the 8 inch (20.3 cm) PVC pipe.
-
Glue the foot valves. The foot valve is the mechanism that allows water to be drawn in but does not allow water to escape back out. There are two foot valves used in this well. The first one is at the bottom of the six inch PVC pipe and the second one is at the bottom of the 4 inch (10.2 cm) PVC. These mechanisms will allow the water to be drawn into the 6 inch (15.2 cm) pipe on the upstroke of the well, and it well push water through the 4 inch (10.2 cm) pipe on the down stroke. The down stroke will be the stroke in which the water is pushed out of the well.
-
Bore the well.
- Use the hand auger to bore the well. Turn the auger in a clockwise direction into the ground. Remove the auger from the ground and empty it when full.

- Continue to bore into the ground using the hand auger. When the bore is too deep for the auger attach a drill rod to the auger in order to make the auger longer. (Installing/ removing the auger from the bore becomes challenging when the auger with the drill rods becomes long. To overcome this, use the spanner catch the auger while you install or remove the auger in pieces.)


- Use the hand auger to bore the well. Turn the auger in a clockwise direction into the ground. Remove the auger from the ground and empty it when full.
-
Bail the well.

-
Set up the tripod directly over the bore.

-
Install the Well Screen.

-
Install the outer foot valve pipe.

-
Install the inner foot valve pipe.
-
 Install the handle.


