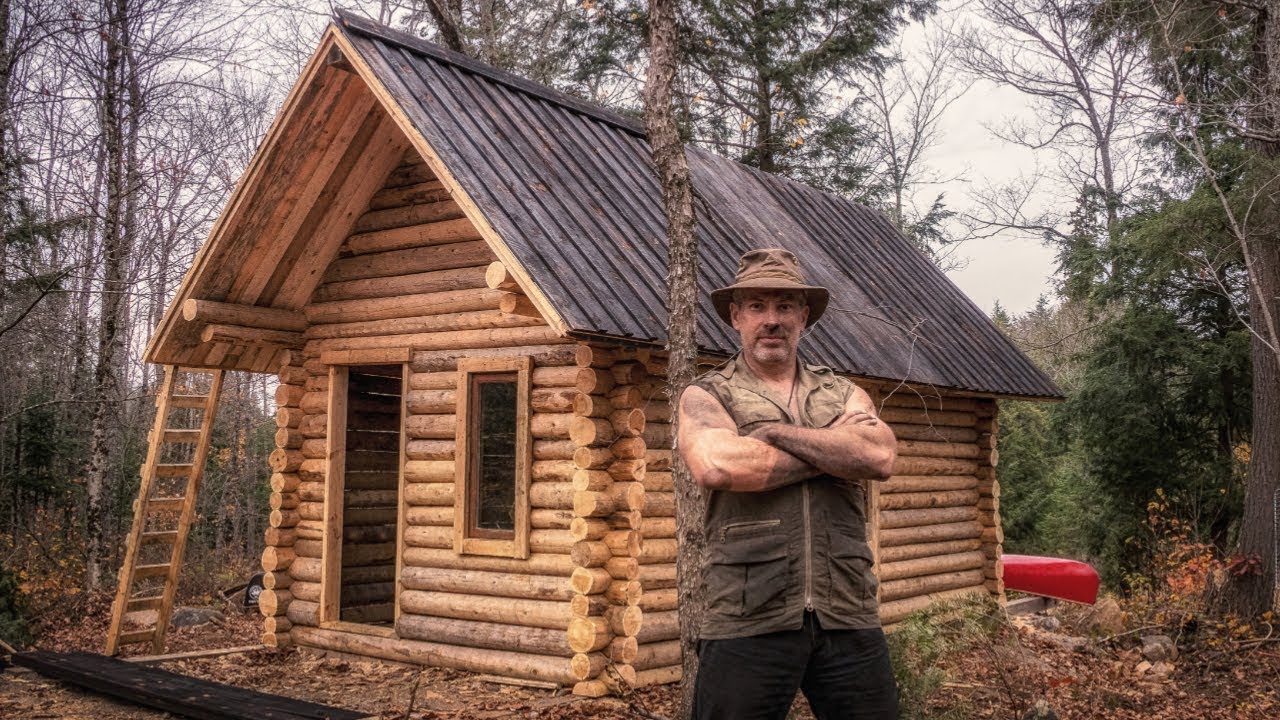
Here’s another self-reliance proponent building a cabin off-grid. He’s very talented and brings his roofing experience to bear on his choice of roof. You can watch every step, and there’s no chattering.
Here’s what he says:
“Finally, one video showing the entire build process from the cutting of the first tree to the laying of the last floor board – no food, no talking, no visitors, just carpentry, bushcraft, timber framing, blood, sweat and tears. My end goal is to have an off-grid, primitive wilderness homestead, where I can practice primitive technology, bushcraft and traditional skills in an effort to become as completely self reliant as possible in this day and age.
In late April, I cut the first balsam fir tree down on the property near Algonquin Park, Ontario, Canada. Next, from June until August, I collected all of the building materials and fabricated the cabin using saddle notches in the corners. I cleared the land in August, laid down gravel for a pad and began erecting the off grid log cabin.
By September, the walls were done and I started on the roof framing in October. In November, I burned the roof boards with shou sufi ban*, an ancient Japanese technique for preserving wood. Against convention, I installed the roof in board and batten fashion, using my roofing background to come up with techniques to keep the cabin watertight.
Next, I moved inside where I installed a Vermont Castings wood stove on top of a limestone flagstone floor, which extended from the doorway to the center of the cabin underneath the fireplace. For the rest of the floor, I framed it using 2×4 and 2×6 red pine boards and then installed 2x6x10′ boards, which I burned using the same shou sufi ban* technique. Now in December, I chinked the walls with moss and clay and have been spending a lot of time in the cabin, starting rustic furniture made with materials from the surrounding forest.”
I like his stove from www.vermontcastings.com but it’s much more expensive than the one I highlighted last week from gstove. The decision would be based on how much, and how long you anticipate cooking on it, or how much burning and heating you’ll need it to withstand.
*

The layer of char protects the wood from UV and weathering. This means that the wood will not fade or peel. This char finish can last upwards of 80-100 years without maintenance, and with proper maintenance can last much longer. Not only does this durability preserve the aesthetic character and structural integrity of the siding/fencing, but it also saves a significant amount of money in the long run. Re-painting a house every 10 years is a significant expense, and re-siding costs even more. Using Charred Wood for siding or roofs will reduce or eliminate long-term maintenance and replacement costs. It also weatherproofs outside furniture and looks cool on interior surfaces. There’s a great guide here.
Charred wood is more bug/pest resistant than normal wood. Termites and other pests hate the layer of char, and it deters them from trying to eat into or make their homes in your siding or fencing. Ironically, charing also makes wood more resistant to fire.
You’ll need a high-intensity flame, such as an ice torch, (about $35 on Amazon) to char your wood. Cedar works best, but hemlock, pine, maple, or oak will also work.
