We are delighted to share a success story from one of our readers in Tennessee. He choses to remain anonymous – perhaps because he doesn’t want us storming his fields! Thank you for this great ‘how-to’ article, Mr Mushroom Man!
I got the idea of raising mushrooms from my granddaughter’s high school agriculture class last year. We have a wooded area on our property, so I figured I might try it out. Almost all of the research and buying supplies I got from Field & Forest ([email protected] or (800) 792-6220). They are an excellent resource!!
I started out by clearing a section of our woods that is adjacent to our house. In dry spells (more than a week of no rain), it is sometimes necessary to water the mushroom logs (I have a garden hose/sprinkler system for this), so I wanted to set it up close to the nearest water spicket. The next step was to cut the logs. For best results, the trees need to be cut in the dormant (no leaves) period, so I waited until December and started to cut the trees for logs. The lengths can vary – most will cut around 3-feet, but I decided to cut them at 4-feet instead. The diameter of the logs usually run from 4-to-8-inches. Just note, the bigger the log, the harder it is to handle.
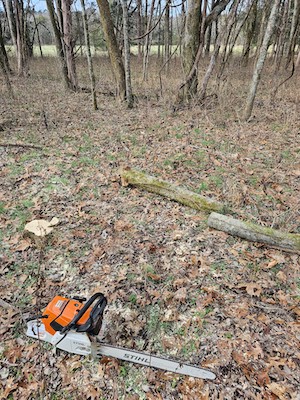
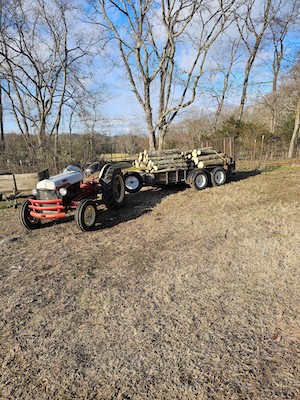
For the mushrooms I was wanting I needed oak and hackberry trees. I had hackberries, but didn’t have enough oak that was easy to get to, so I called a friend of mine that owns a lumber mill and asked him where I could get some oak logs. As it turned out, he logged out a bunch of white oak trees and the tops were still in the woods. I worked out a deal ($1 per 4-foot log) with the landowner and went in and cut the logs from the tree tops that were down.
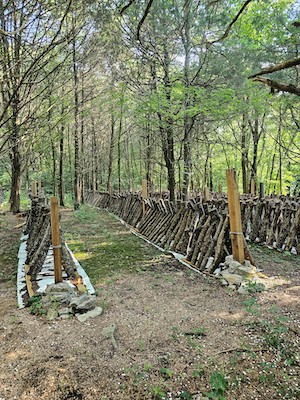
Around the same time I was collecting logs, we constructed some fencing to lean the inoculated logs against. We put down some vinyl (20mm) that is used for a house crawlspace vapor barrier to keep the weeds from growing up around the logs. We also put down some cedar “first cut” pieces for the base of the log to rest against to resist rotting of the logs.
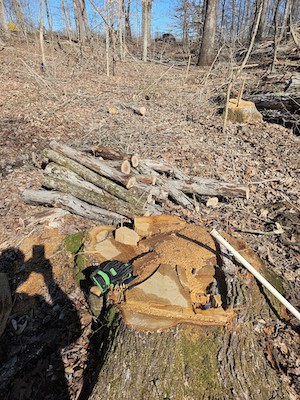
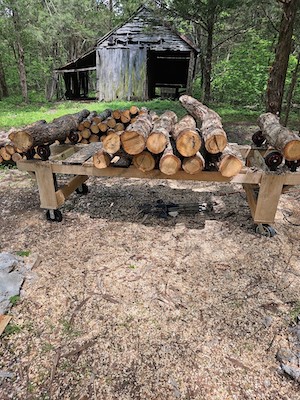
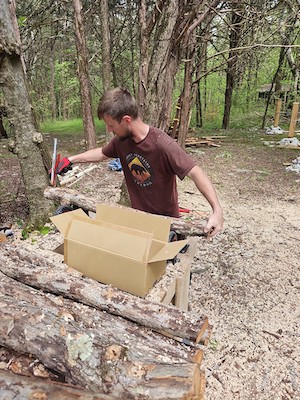
We also constructed a workbench to inoculate the logs. It had a set of wheels on each end so that you can spin the log as you are working on it. Our set up will allow people at each end to work simultaneously. The tools that I used for inoculation was just a special bit that attaches to an angle grinder for boring holes into the log and an “automatic” spore inoculating tool. I say automatic, because it combines two steps into one: inoculate and seal (with a foam cup) the hole. Most users will use a hand inoculator where you “inject” the spore into the hole in one step, then brush on melted wax to seal the hole. For me, that was going to be too much work and too slow. I did the lion’s share of the work myself, but am grateful for the family participation. It definitely goes faster with more people.
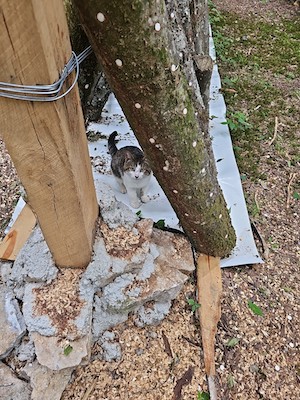
Even the cat decided he needed to “Supervise”.
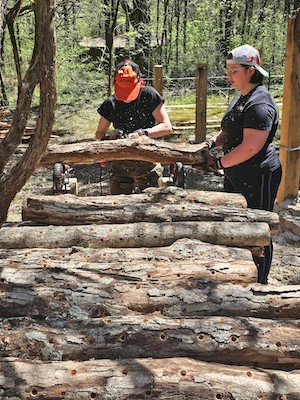
Generally people will either stack the logs like “Lincoln Logs” or as we have done as an A-frame.
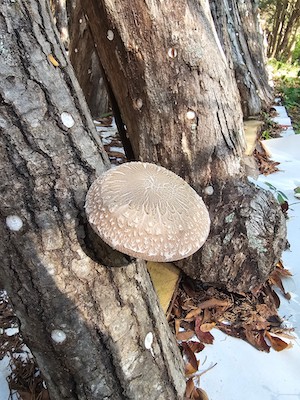
We ended up doing over 1,100 logs. It was A LOT of work and unless you LOVE mushrooms, I would suggest going much smaller. We have both medicinal and edible mushrooms. We plan on freeze-drying the surplus so we will have it on hand for years. The mushrooms will continue to grow every season until they consume the whole log. Generally you get about a year per inch of diameter – so for a 6-inch log, you can expect around 6 years of fruiting before the log is “spent”. I wasn’t expecting any mushrooms this year, but I was surprised to find some Shiitakes fruiting now (September). We are planning to eat some tonight.

Update! They taste great!
Yesterday I just sautéed some in butter and some Avocado oil. Because it has been so dry right now, they needed a little hydrating. They tasted good, but a little dry. Tonight I will sauté the rest, but will add a little water in with them first. I will cook them with onions tonight because we will be having hamburgers with the mushroom topping. Hopefully we will get some rain shortly.