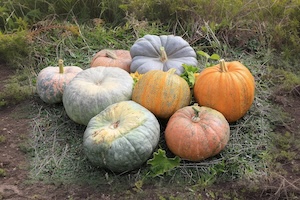
October is pumpkin month. Farm stands are full, and a few pie pumpkins can go a long way. If you want to put some of that harvest on the pantry shelf, there’s one rule to learn before you start: can pumpkin in cubes, never as puree.
That rule comes from the National Center for Home Food Preservation (NCHFP) at the University of Georgia, the go-to source for tested home canning methods. Here is how to do it safely, and what to do with the pumpkin you want to keep mashed.
Why mashed pumpkin is off the table
Pumpkin is a low-acid food, so it has to be pressure canned, not done in a boiling water bath. The trouble with mashed pumpkin and pumpkin butter is that no one can promise the heat will reach the center of the jar.
The NCHFP explains that researchers at the University of Minnesota in the 1970s found the thickness of pumpkin puree varied so much from batch to batch that “a single processing recommendation to cover all the variability could not be calculated.” A 1995 University of Missouri study found that pumpkin butter made from the same recipe had widely varying acidity, with some batches as high as pH 5.4.
That combination is a recipe for botulism. If the bacteria survive processing, the NCHFP warns, they can produce toxin and cause a “very serious illness which can result in death.” Adding sugar, lemon juice or vinegar doesn’t fix the problem, because the variation is too great for any single recommendation.
So the tested method is cubes. You can mash them later, when you open the jar.
What you’ll need
- A pressure canner (dial-gauge or weighted-gauge)
- Pint or quart canning jars with new lids and bands
- Small sugar or pie pumpkins, or winter squash with a hard rind and stringless, mature flesh
The NCHFP says you’ll need about 16 pounds of pumpkin for a canner load of 7 quarts, or about 10 pounds for 9 pints. That works out to about 2¼ pounds per quart.
Step by step
- Prep. Wash the pumpkin, remove the seeds, cut it into 1-inch-wide slices and peel them.
- Cube. Cut the flesh into 1-inch cubes.
- Boil. Boil the cubes in water for 2 minutes.
- Pack hot. Fill jars with the hot cubes and cover them with the cooking liquid, leaving 1 inch of headspace.
- Process. Pressure can pints for 55 minutes and quarts for 90 minutes.
Getting the pressure right
The right pressure depends on your altitude and your canner type. These are the NCHFP’s settings:
Dial-gauge canner
- 0 to 2,000 feet: 11 pounds
- 2,001 to 4,000 feet: 12 pounds
- 4,001 to 6,000 feet: 13 pounds
- 6,001 to 8,000 feet: 14 pounds
Weighted-gauge canner
- 0 to 1,000 feet: 10 pounds
- Above 1,000 feet: 15 pounds
Don’t shorten the times or guess at the pressure. Those numbers come from testing.
Want puree? Freeze it
If you want ready-to-use mashed pumpkin for pies and bread, the freezer is your friend. The NCHFP’s freezing method is simple: wash and section the pumpkin, cook it until soft, scoop the pulp from the rind and mash it. Cool it by setting the pot in cold water and stirring now and then. Then pack it in freezer bags or containers, leaving ½ inch of headspace.
The NCHFP also offers a dried option, Spicy Pumpkin Leather. You blend cooked puree with honey and spices, spread it ¼ inch thick on lined trays and dry it at 140°F for 6 to 12 hours, until a finger leaves no mark. Roll it in plastic wrap and keep it in a freezer bag for up to a month.
Using your jars
When you’re ready to bake, the NCHFP says to drain the jars and then strain or sieve the cubes. You’ll have smooth pumpkin ready for pie, soup or muffins, with no worry about what’s growing in the middle of the jar.
The bottom line
Canned pumpkin cubes are one of the easiest ways to turn a seasonal fall crop into months of meals, and the method is simple once you have a pressure canner. Just remember the rule: cube it, don’t mash it. Can the cubes, freeze the puree, and your family will be eating pumpkin bread long after the farm stands close for the season.
Sources
- National Center for Home Food Preservation: Pumpkins and Winter Squash – Cubed
- National Center for Home Food Preservation: Beware: Pumpkin Butter
- National Center for Home Food Preservation: Plenty of Pumpkin Possibilities