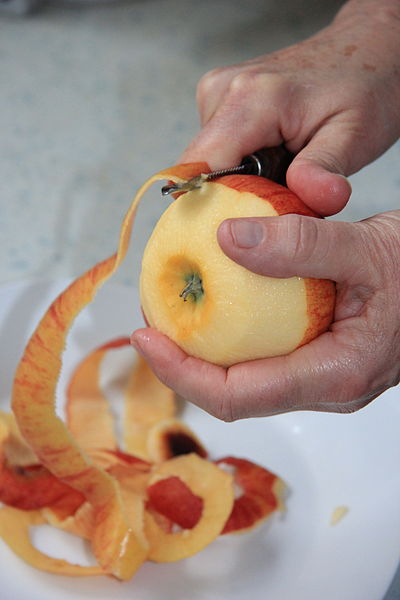
Apple season is here, and if you have a tree, a farm stand nearby or a good sale at the store, you may have more apples than you can eat. Drying them is one of the easiest ways to put them up.
Dried apples need no canner, take little shelf space and make a great snack for hunting trips, lunch boxes and the pantry. Properly stored, dried fruit keeps 6 to 12 months, according to Colorado State University Extension. The National Center for Home Food Preservation says most dried fruit keeps about a year at 60°F.
Here’s how to do it the safe, tested way.
Step 1: Pick and slice
Start with mature, firm apples, Colorado State Extension advises. Wash them well, then peel and core.
Cut them into rings or slices 1/8 to 1/4 inch thick. You can also cut quarters or eighths, but thinner pieces dry faster and more evenly.
Step 2: Soak to keep them from browning
Cut apples darken fast. A short soak, called a pretreatment, keeps the color bright. Colorado State Extension lists these options. Soak the slices for 10 minutes, then drain well.
- Ascorbic acid (vitamin C): Stir 2 1/2 tablespoons of pure ascorbic acid crystals into 1 quart of cold water. One quart treats about 10 quarts of cut fruit.
- Lemon juice: Mix equal parts lemon juice and cold water, such as 1 cup of each.
- Sodium metabisulfite (optional): Stir 1 tablespoon into 1 quart of cold water. Use only food-grade or reagent-grade product. Skip this one if anyone in your house is sensitive to sulfites.
If you use sulfite-treated fruit, bag it before putting it in a metal container. The NCHFP warns that sulfur fumes can discolor the fruit when it touches metal.
Step 3: Dry at 140°F
Lay the drained slices in a single layer on trays. Dry them at 140°F in a dehydrator or an oven. Expect it to take 6 to 24 hours, depending on slice thickness and your equipment, according to Colorado State Extension.
The NCHFP notes that dehydrators are built to dry foods quickly at 140°F. A timer that shuts the unit off can keep food from scorching if it finishes overnight.
A few tips from Colorado State Extension:
- Air flow matters. Drying depends on heat, dry air and moving air.
- Oven drying works. Trays should be about 1 1/2 inches smaller than the inside of the oven. If you stack trays, keep at least 2 inches between them.
- Watch your trays. Avoid galvanized screen, and don’t use bare aluminum without a liner.
- Turn and stir. Move pieces around every 3 to 4 hours.
How to tell when they’re done
Dried apples should be soft, bendable and leathery, with no wet spot in the center when you cut one open.
Let a few pieces cool to room temperature before you test. Warm fruit feels softer and wetter than it really is. Then squeeze a handful. If your hand stays dry and the pieces spring apart when you let go, they’re done.
Step 4: Don’t skip conditioning
This is the step many beginners miss. After drying, some pieces will hold more moisture than others. Conditioning evens it out so one damp slice doesn’t spoil the whole jar.
The NCHFP says fruit should be around 20% moisture. Pack the cooled fruit loosely in glass or plastic jars, seal them, and let them stand 7 to 10 days. Shake the jars every day.
If you see moisture beading inside the jar, put the fruit back in the dehydrator for more drying.
Storing your apples
Once conditioned, pack the apples in clean, dry, insect-proof containers. Glass canning jars, freezer containers with tight lids, and freezer bags all work, the NCHFP says. Vacuum sealing is fine, too.
Pack in amounts you’ll use at one time, because each time you open a container you let in air and moisture. Store in a cool, dry, dark place. Heat shortens shelf life: most dried fruit keeps about a year at 60°F but only about 6 months at 80°F, according to the NCHFP.
Check your jars often. Glass makes it easy to spot condensation. If fruit has picked up moisture but isn’t spoiled, use it right away or dry it again. Throw out anything with mold or an off smell.
The bottom line
Drying apples is a simple skill that turns a fall harvest into months of healthy snacks, with no canner, no pressure and very little cost. Slice them thin, soak them, dry them at 140°F, and take the extra week to condition them.
Do it right, and you’ll be reaching into the pantry for a taste of October all winter long.
Sources
- Colorado State University Extension: Drying Fruits
- National Center for Home Food Preservation: Packaging and Storing Dried Foods
- National Center for Home Food Preservation: Food Dehydrators